Adding a Storage Disk To Linux
Adding extra storage in Linux is one of those everyday sysadmin tasks — especially in virtual machines. In big enterprise setups, you’d normally use LVM (Logical Volume Management), but sometimes you just need to drop in a simple disk and make it usable.
That’s what we’ll do here: add a plain disk, partition it, format it, and mount it so Linux can use it.
Connect a New Disk
How you attach a disk depends on your setup:
- Physical server → crack open the case/rack and plug it in (not covered here).
- Virtual machine → add one through your hypervisor.
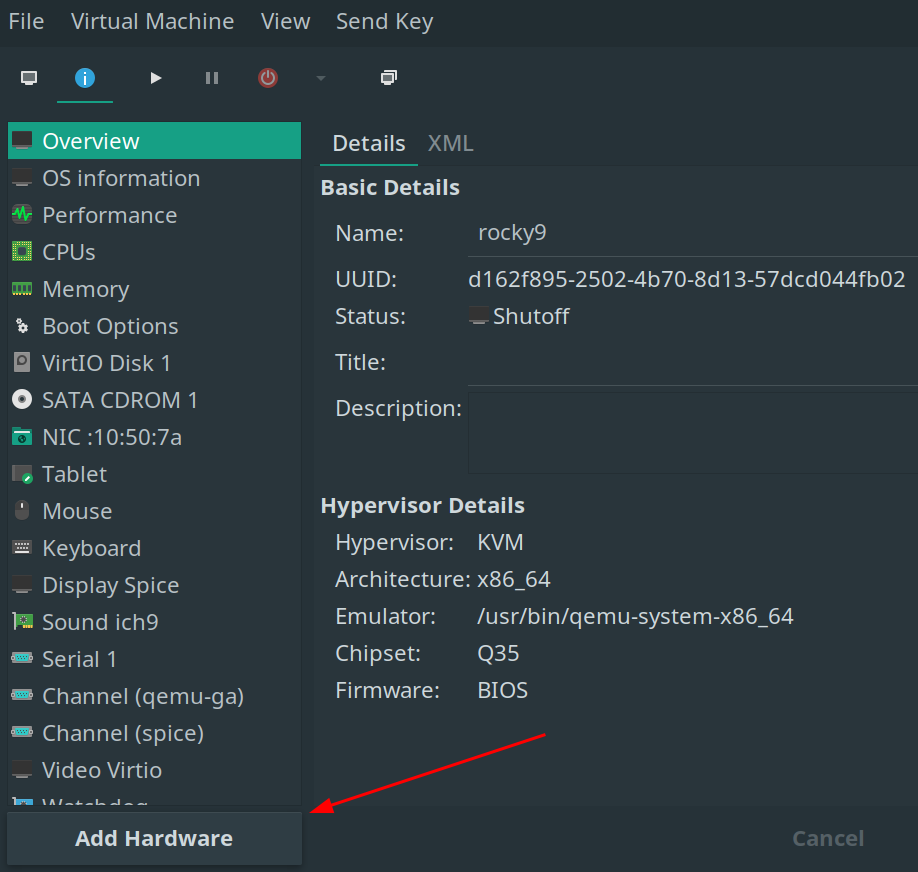
In this demo we’re using Virtual Machine Manager (a front-end for KVM/QEMU). The process is similar if you’re on VMware, VirtualBox, or Hyper-V.
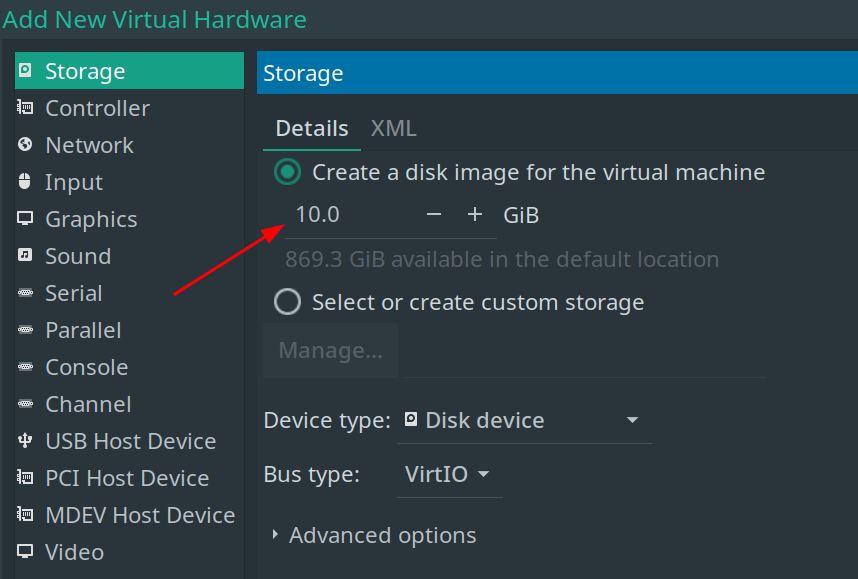
Open the VM details, hit Add Hardware, and create a new disk:
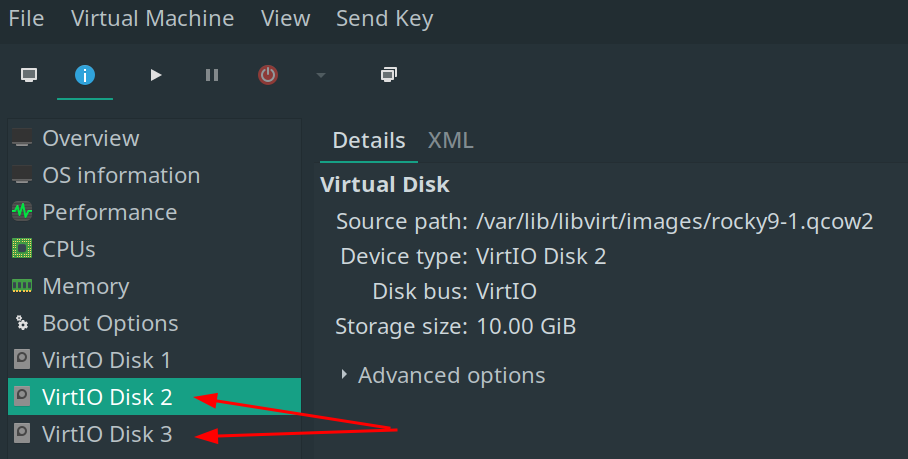
We’ll add a couple of 10GiB virtual disks:
They’ll then show up as hardware for the VM:
Find the Added Disks with lsblk
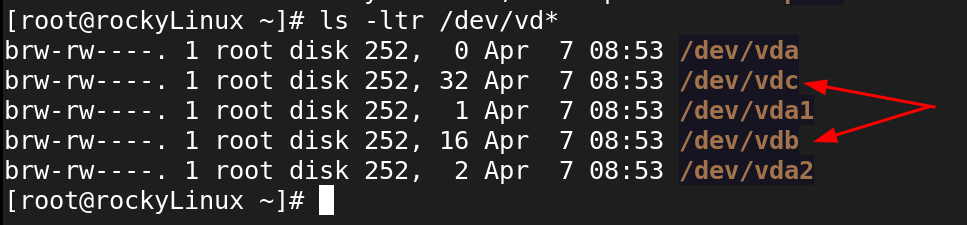
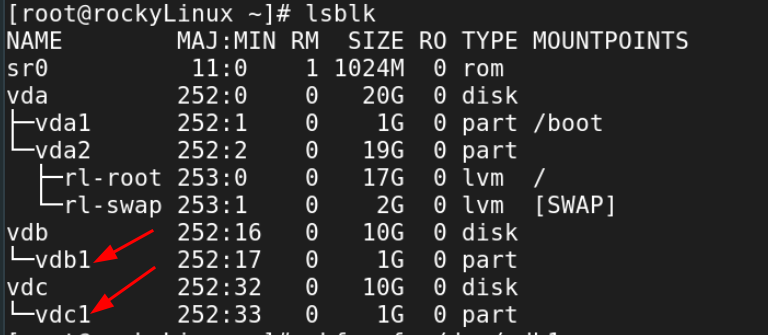
Boot the VM, log in, become root, and run lsblk. You’ll see your new
disks — the names depend on the hypervisor (sdb, vdb, etc.):
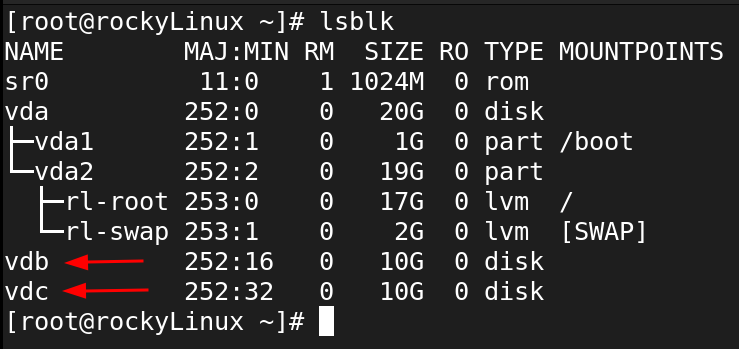
Here they’re vdb and vdc, which live in /dev/:
⚠️ Heads-up: storage management is root-level work. Don’t try this as a normal user.
Create a Partition Table with fdisk
Fresh disks are blank slates — no partition table, no use. - MBR = old style (limited, mostly legacy now). - GPT = modern, flexible, and what we’ll use.
Run fdisk on the new disk:
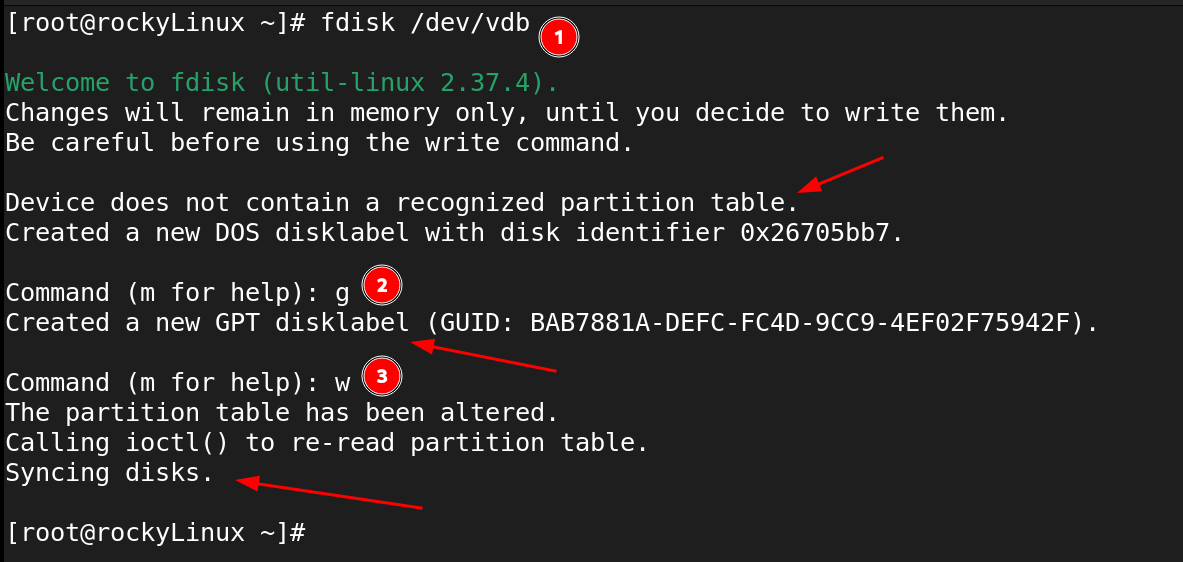
Inside fdisk:
- g → create a GPT partition table
- n → create a new Partition
- p → print the partition table
- m → print the help menu
- w → write changes and exit
fdisk Help
Help inside fdisk can be found with m (some think of it as m for Menu)
Use fdisk to Create Partitions
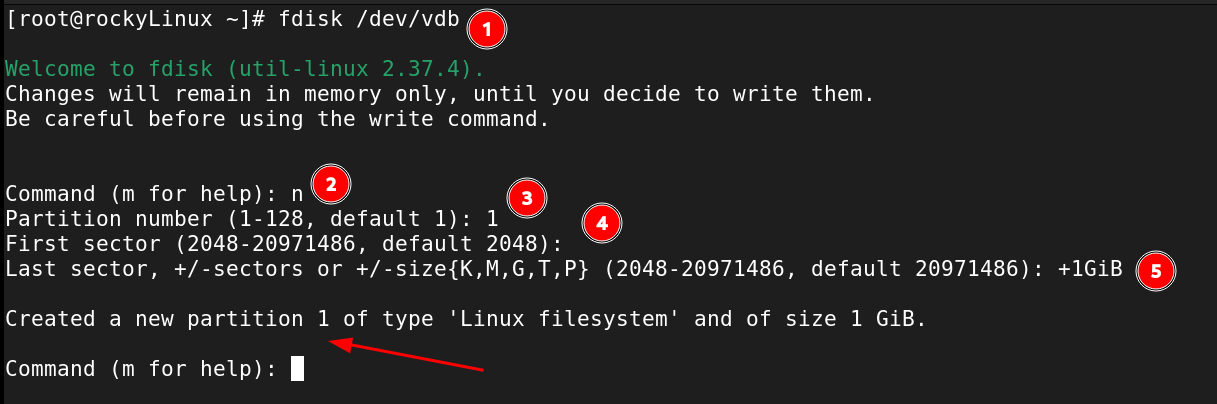
Reopen fdisk on /dev/vdb and create a partition:
- n → new partition
- choose number, start, and size (or just hit Enter for defaults)
Here’s an example making a 1GiB partition:
Note
Pressing Enter at the prompts usually accepts sensible defaults
Validate Partition and Write to Disk
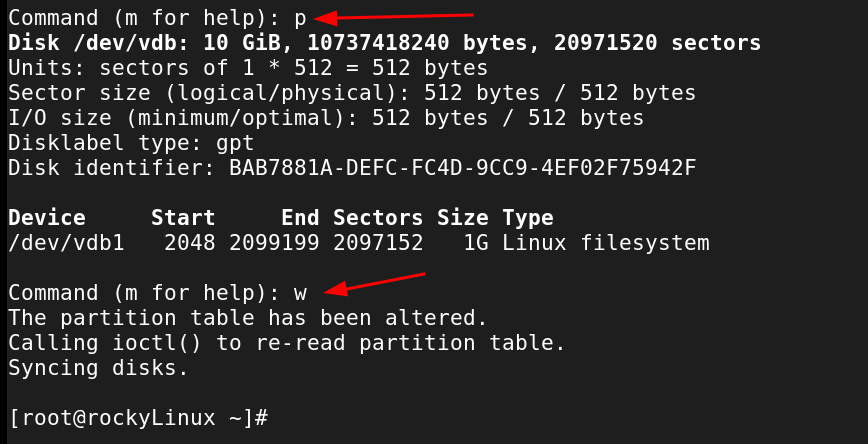
Still in fdisk:
- p → print the partition table (double-check your work)
- w → write to disk
Repeat these steps to create another partition on the disk that was created.
Once both partitions are created, a simple lsblk should show both disks
with partitions, ready for the next steps:
Make a File System On the Created Partitions
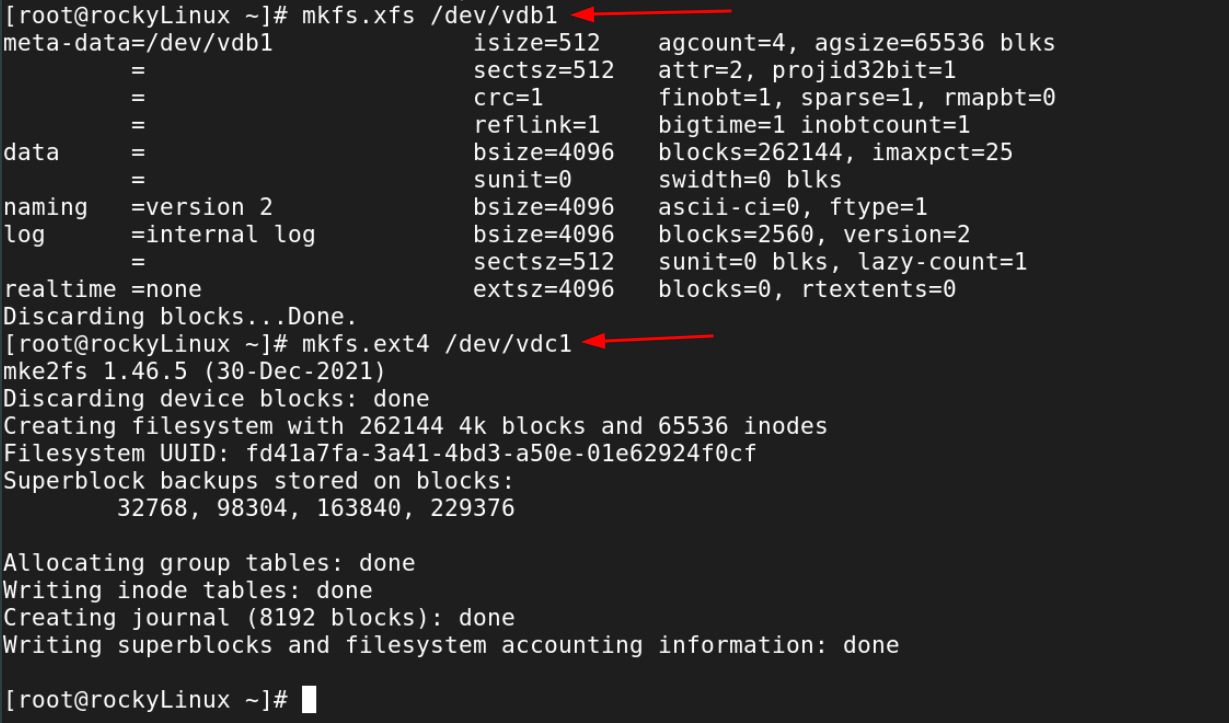
Partitions are just containers. To actually use them, format with a filesystem:
File System Types
Just for fun, we created two different types of file systems, one xfs
and the other ext4. File system types are a big topic, but these are
two very important types.
Create a Directory for the File Systems
In Linux, new storage doesn’t show up as a drive letter. You need to 'attach' it somewhere in the filesystem.
For this demo:
- /app → XFS disk
- /db → ext4 disk
root, therefore no sudo):

Make a Backup of /etc/fstab
The /etc/fstab file controls which filesystems get mounted at boot. It’s
powerful but unforgiving: one bad entry can prevent the system from starting.
Make a backup first:

Make the Mounts Automatic and Permanent
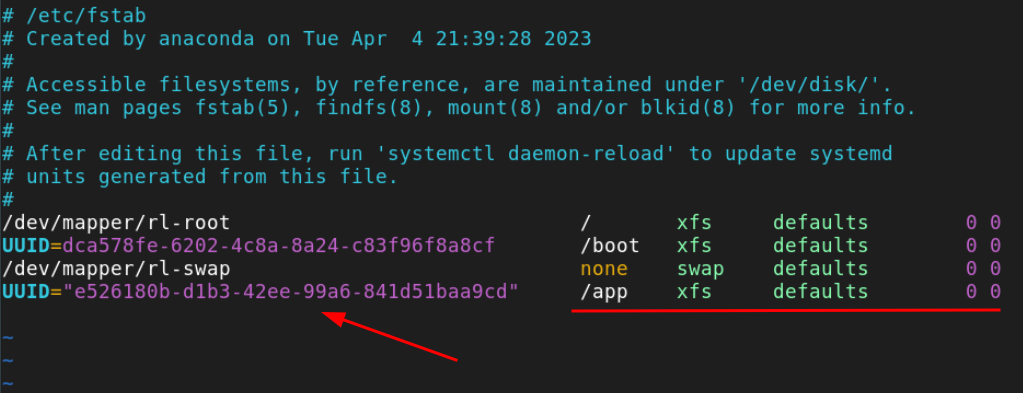
Best practice is to mount by UUID (unique ID) instead of device name. Grab it with:
Append it to /etc/fstab:

Append, Don't Overwrite!
Note that this APPENDS (>>) to /etc/fstab. Do not overwrite /etc/fstab! (But if that happens, simply revert using the backup taken above!) It is highly recommended to confirm the output of the command is as expected BEFORE appending it to /etc/fstab. This kind of "trust but verify" mentality will save many blunders in the command-line.
Then check that /etc/fstab has this line:
In our example, /etc/fstab now looks like this:
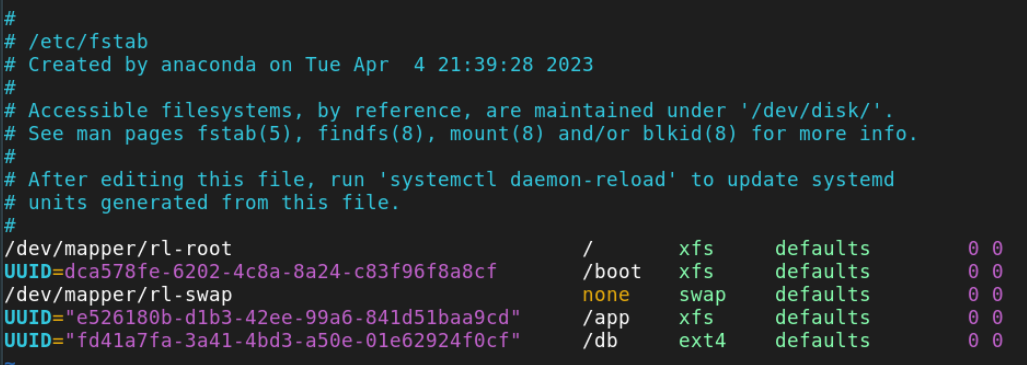
Repeat for the other disk. The final /etc/fstab should look like this:
Mount & Validate the New Storage
Apply the changes with:
Verify both disks are showing up and that there are no issues with:
mount | grep vd[bc] # will vary depending on setup/hypervisor
findmnt --verify
For example:

A couple other checks could be:
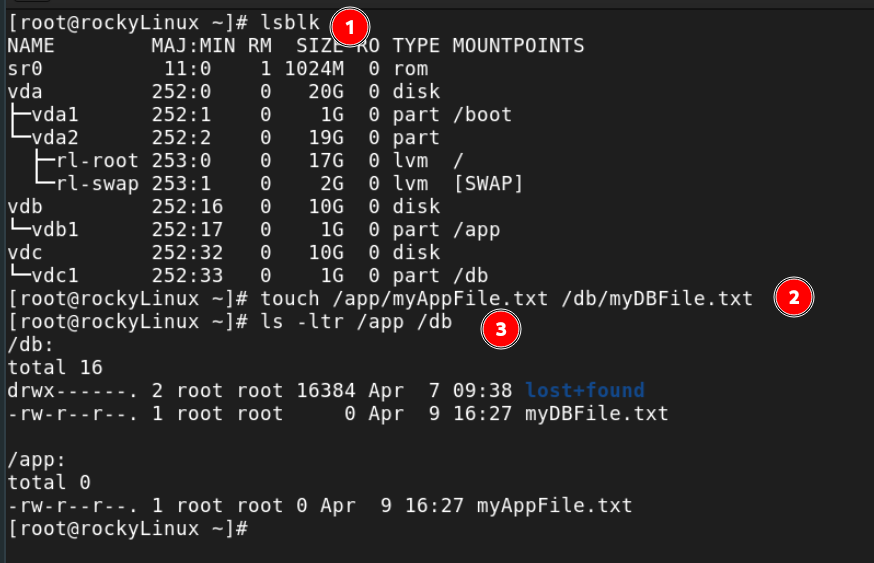
Test them by creating files, then reboot to make sure mounts survive.
If the system won’t boot, don’t panic — drop to root shell and restore your backup:
Go add some storage to a Linux system! Enjoy!
Using parted
As mentioned above, there is also a parted utility which works with storage disks.